
 Microsoft Office
 Microsoft Windows


 CAD
CAD Multimedia
 VPN
VPN Tools & Utilities

Where Is the Startup Folder in Windows 11/10?
The startup folder in Windows 11/10 is an incredibly useful feature that allows you to launch programs or perform certain tasks when your computer boots up. This feature can save you time and make your computing experience more efficient.
In this article, we will discuss how you can access the startup folder, add and remove items from it, and provide tips on how to customize your startup experience.
Table of Contents
- What Is the Windows Startup Folder?
- Windows 11/10 Startup Folder Location
- How to Find the Startup Folder in Windows 11/10
- Find the Windows Startup Folder With Run
- Find the Windows Startup Folder With File Explorer
- Find the Windows 11 Startup Folder for All Users
- How to Change What Programs Run at Startup in Windows 11/10
- Tips for Customizing Your Startup Experience
What Is the Windows Startup Folder?
The Windows Startup folder in the Windows operating system contains applications that will launch when your computer boots up. Any application or script in this folder will run as soon as you turn on your computer. The startup folder can be accessed from different locations, depending on the version of Windows you’re using.
In older versions of Windows, such as 7 and Vista, you can access it through the Start menu by clicking All Programs > Startup. However, this doesn’t exist in Windows 10 or the latest Windows 11 systems.
A startup folder ensures the programs stored there will automatically run during each boot process and customize certain default configurations for specific software tools. This way, any configuration settings made within those applications don’t have to be done manually every time they are opened but rather once upon system startup or reboot.
Having several applications running upon system start-up can take up unnecessary resources such as RAM memory and CPU power if not used wisely, so it is recommended to only include essential programs inside the startup folder unless necessary otherwise due to specific needs and preferences related to these applications’ overall usage patterns within their respective workflows.
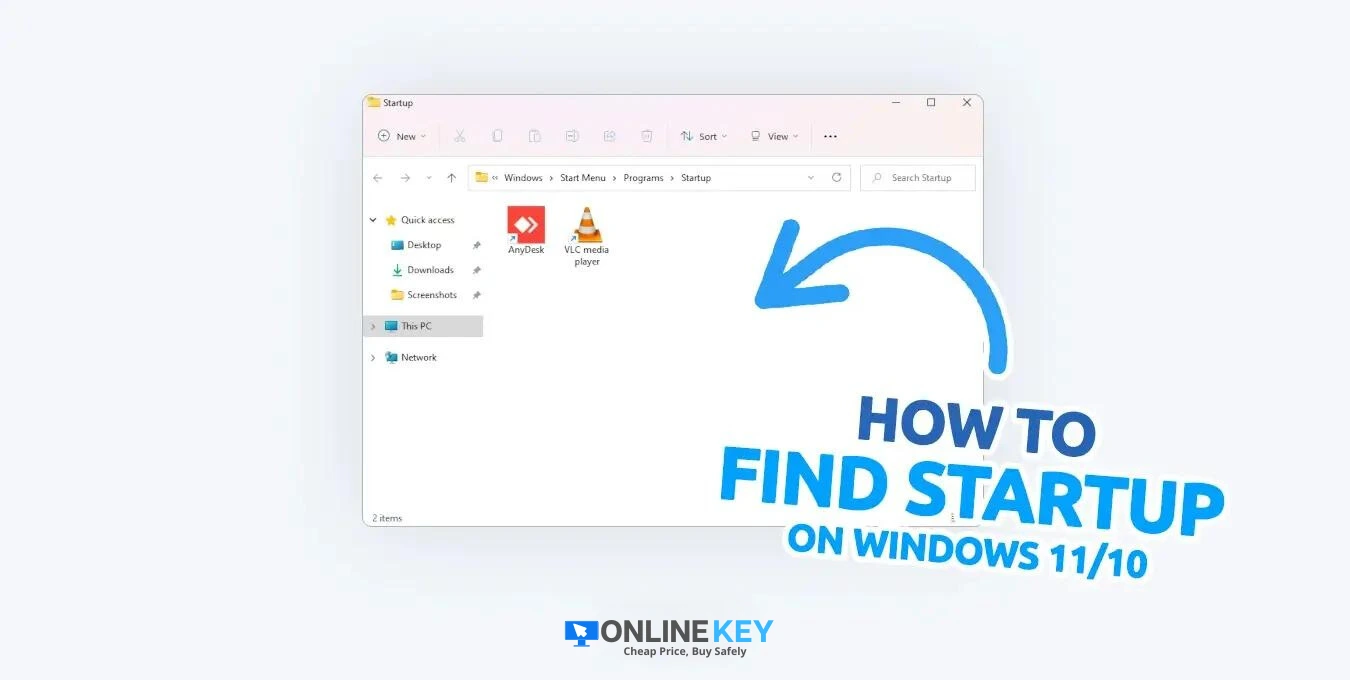
Windows 11/10 Startup Folder Location
Looking for the Startup folder in Windows 11 or 10? Unfortunately, there’s no Start menu shortcut to it. But not to worry! You can easily find it through a few simple steps. Copy and paste this path into your File Explorer address bar, and you’ll be on your way. The Windows 11/10 Startup folder is located in:
C:\Users\username\AppData\Roaming\Microsoft\Windows\Start Menu\Programs\Startup
Make sure to replace “username” with your local user or another user on your computer you want to check startup apps for. Once in the Startup folder, you can easily add any application or script you want to run upon system startup. You can also remove applications from this folder if they are no longer needed.
How to Find the Startup Folder in Windows 11/10
You can use several methods to access the Windows 11/10 Startup folder. Let’s take a look at the three most common ways below.
1. Find the Windows Startup Folder With Run
The Run applet is a feature in Windows 11 and 10 that allows users to quickly open applications, launch files, access system settings, search the web, and more. This tool is particularly useful when you know exactly what you want to do but can’t remember how to get there. The Run utility simplifies the process by allowing you to access various tools from one central location.
You can use the Run applet to get to your Startup folder quickly. You need to do this:
- Press the Windows + R keyboard shortcut to bring up the Run applet. Here, type “shell:startup” without the quotes, and then hit Enter.
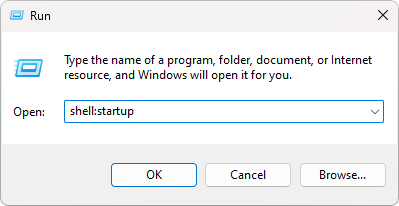
- The Run applet will immediately open the Startup folder in your File Explorer. You can make changes here, like deleting or adding a shortcut.

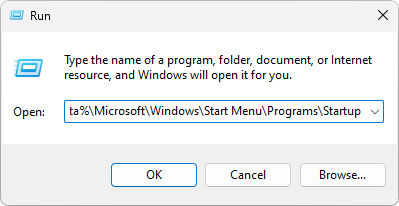
- Alternatively, after pressing the Windows + R keyboard shortcut, you can input “%appdata%\Microsoft\Windows\Start Menu\Programs\Startup” without the quotes and press Enter. This will also take you to the Startup folder on your current user.
2. Find the Windows Startup Folder With File Explorer
File Explorer is an application that allows you to browse and manage your files, folders, and drives. The File Explorer contains all the features necessary for working with items on your computer, like creating and deleting files and folders, searching for content within your documents, and copying/pasting items between different locations.
Using File Explorer, you can easily navigate to the Startup folder in Windows 11/10. Here’s what you need to do:
- Open File Explorer from your taskbar or press the Windows + E keyboard shortcut.
- Before beginning, you must ensure that hidden files and folders are shown in your File Explorer. To do this, click on the three-dot menu in the toolbar, and select “Options” from the context menu.
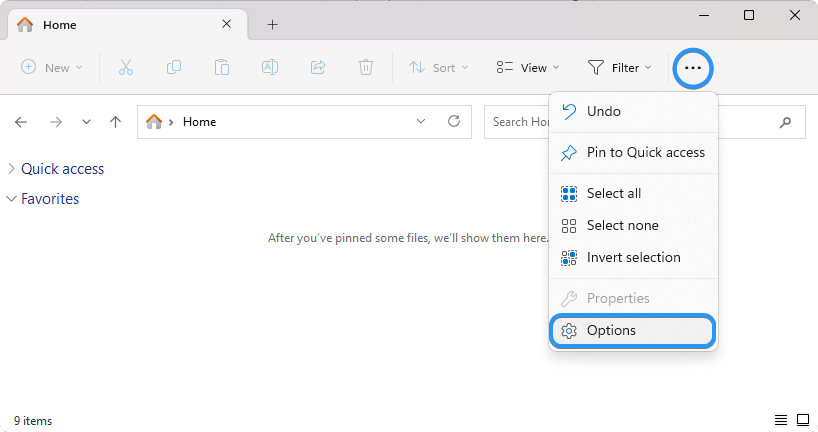
- Switch to the “View” tab using the header menus. Here, scroll down until you see “Hidden files and folders.” Click on it once to expand its options, and make sure “Show hidden files, folders, and drives” is enabled.
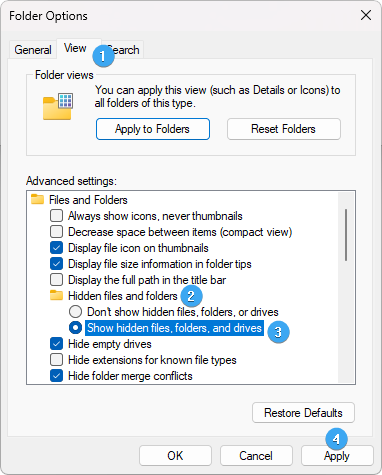
- Click the Apply button to finalize your changes, then close the window with the OK button.
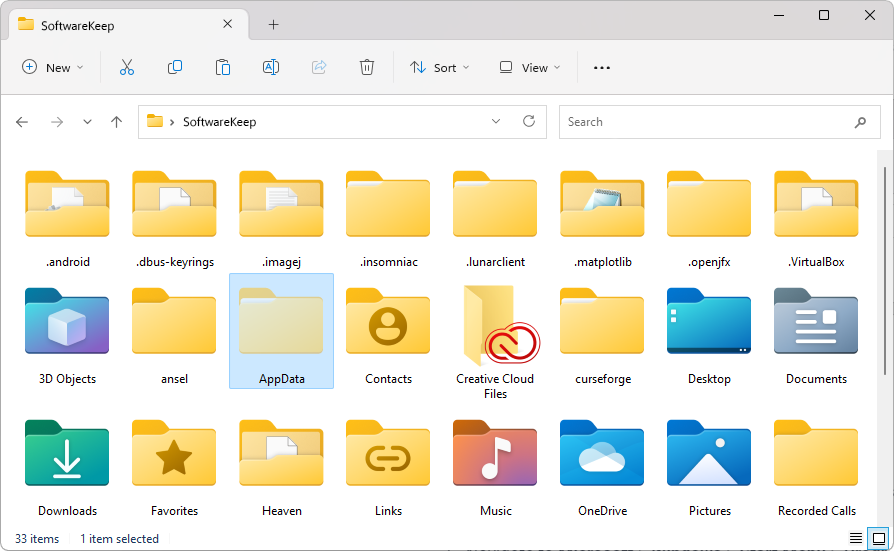
- Next, click on the arrow in the File Explorer address bar, and click on the folder with your local username.

- Open the “AppData” folder. It should look different from a regular folder, as it’s a hidden file you’re not supposed to see by default.
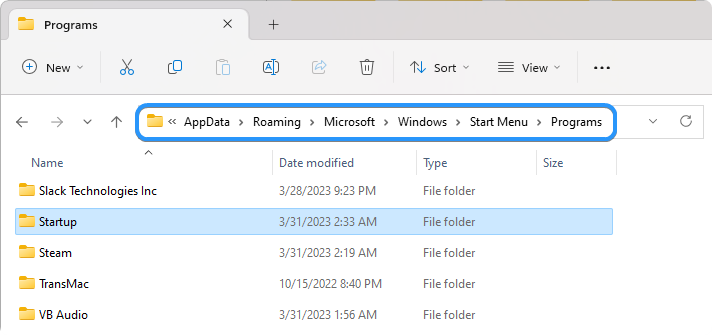
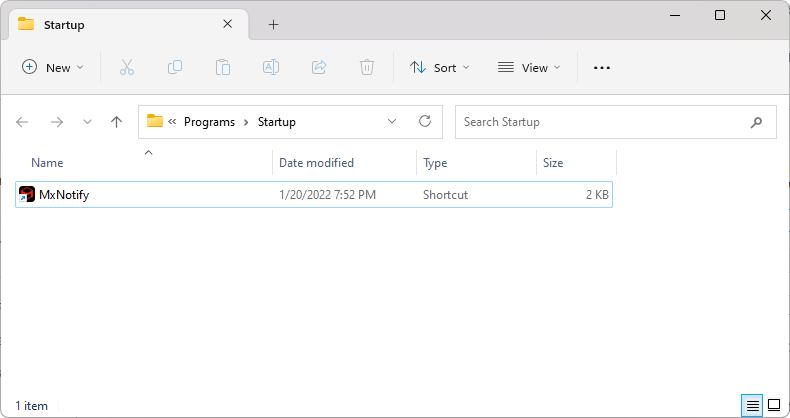
- Navigate to Roaming > Microsoft > Windows > Start Menu > Programs location, and look for the “Startup” folder. Double-clicking on it will open the folder containing your startup app shortcuts.
3. Find the Windows 11 Startup Folder for All Users
The two methods described above help you locate the Startup folder only for your own user profile. However, some applications install programs for all users, and the shortcuts are then stored in a separate location for the Startup folder.
Here are the steps to locate the “All users” Startup folder location in Windows 11:
- Press the Windows + R keyboard shortcut to bring up the Run applet. Here, type “shell:common startup” without the quotes, and then hit Enter.

- By following this step, you will be able to promptly access the Startup folder for all users on Windows 11.
- Alternatively, you can also input a path to the Run applet. To do this, copy and paste “%ProgramData%\Microsoft\Windows\Start Menu\Programs\StartUp” into the Run input field and press Enter to get there.

To put it simply, “C:\ProgramData\Microsoft\Windows\Start Menu\Programs\StartUp” is the location of the Startup folder for all users on Windows 11 and 10.
How to Change What Programs Run at Startup in Windows 11/10
If too many applications run at startup, your device may slow down. You can remove or disable some applications in your Startup folder to prevent this. You can also use Windows 11/10 Task Manager to edit what programs run automatically when you boot up your computer. Here’s how:
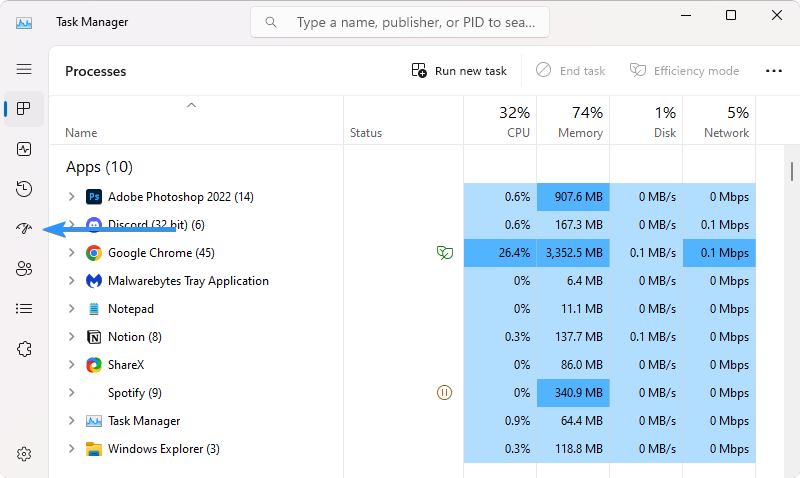
- Right-click on the Start menu and choose “Task Manager” from the options. Alternatively, press the Ctrl + Shift + Esc keys on your keyboard to bring up the Task Manager.
- Switch to the Startup apps tab.
- Review all the applications listed. If you see an app you don’t need on startup, click on it once to select it, and click the “Disable” button.

- If an app you want to start when you boot your system is currently disabled, select it by clicking on it once, then click the “Enable” button.

- Repeat these steps for all applications you want to disable or enable during startup.
Tips for Customizing Your Startup Experience
Now that you know how to access and modify the Startup folder, let’s discuss some other tips on how to customize your startup experience:
- Prioritize essential programs: Only add essential programs for your daily work to the startup folder. Adding too many programs can cause your computer to slow down when it boots up.
- Disable unnecessary startup programs: Go to Task Manager and disable any programs starting when your computer boots up. This will help speed up the boot process.
- Check for changes: After installing new apps, check the Startup folder periodically to ensure nothing has been added without your knowledge.
- Use a third-party tool: Consider using a third-party tool like CCleaner or Autoruns to manage your startup programs. These tools can help you identify and disable unnecessary startup programs.
These tips will help you get the most out of your Windows 11/10 system and maximize your productivity. With a few simple steps, you can customize your computer’s startup experience to fit your needs and keep it running smoothly!
Conclusion
The Startup folder in Windows 11/10 is a handy feature to help you manage and customize your computer’s startup experience. With a few clicks, you can quickly find this folder, add or remove items, and use other helpful tips to get the most out of your system.
This article has been a helpful guide for you to learn about the Startup folder in Windows 11/10. Using the tips and tricks we provided, you’ll be well on your way to having a more efficient and productive computing experience.
One More Thing
We’re glad you’ve read this article. 🙂 Thank you for reading.
If you have a second, please share this article on your socials; someone else may benefit too.
Subscribe to our newsletter and be the first to read our future articles, reviews, and blog post right from your inbox. We also offer deals, promotions, and updates on our products and share them via email. You won’t miss one.


